Butter Mochi Cake
As an Amazon Associate and member of other affiliate programs, I earn from qualifying purchases.
A Butter Mochi Cake is popular in Hawaii, where its origins can be traced. I have baked a similar cake in the past and shared the recipe on this blog. But this was a different easier recipe I tried today and it was a gem.
Butter Mochi Cakes are popular in the state of Hawaii. Convenience stores and food stores sell it. I love visiting Hawaii, but since we can’t fly there right this minute, I did the next best thing and baked this Mochi Cake for our family’s dessert and snacks tonight and the next few days.
I baked this Hawaiian Mochi Butter Cake after my friend Namiko Chen of Just One Cookbook urged friends to bake it in support of the Maui fundraiser she’s currently featuring on her site. Please go see JustOneCookbook.com for how baking this or cooking the other recipes Namiko recommends can help our friends in the recently-devastated Maui. You might want to consider participating.
What is rice flour?
But back to this mochi cake made from sweet rice flour. I used the Mochiko brand of rice flour which is easily available in large supermarkets, Asian markets or online sources.
Rice flour is made from finely milled rice. It is a fine, white powder. Filipino recipes for kakanins (rice cakes) often use this as a main ingredient. Rice flour can also be used as a thickening agent, is an ingredient for making noodles, and makes some of the most delightful sweet cakes like this one.
There are two kinds of rice flour: the glutinous and non-glutinous. The glutinous rice flour is also called “sweet rice”, though it does not taste sweet. The non-glutinous rice flour is made from short-grain rice.
Mixing and Baking
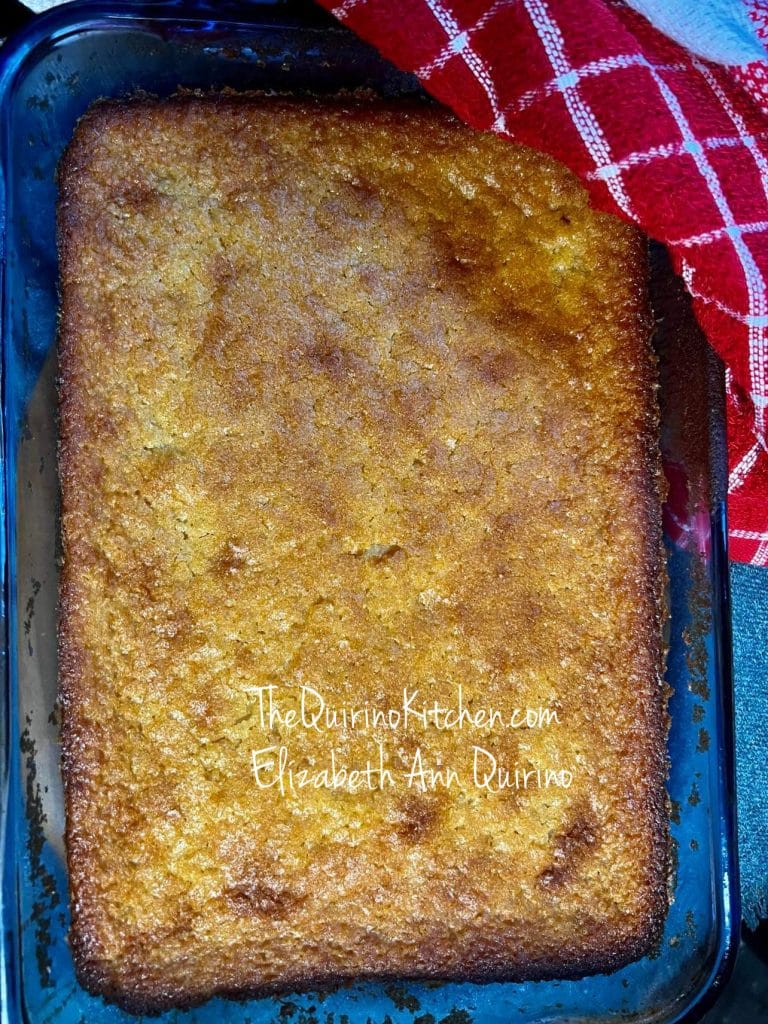
Mixing the batter took a few short minutes once I gathered all the dry and wet ingredients in one place. An electric stand mixer was helpful and did the work for me quickly. I poured the thick batter into a prepared glass Pyrex pan (you can also use metal pans) and baked it in the oven for 45 minutes at 375 F.
The buttery aroma coming from the oven was a signal that the Butter Mochi Cake was almost done. When the timer rang, I opened the oven door, and saw the bubbly top, now a warm, golden color. With my oven mitts, I grasped the glass pan to take it out.
What a Butter Mochi Cake tastes like
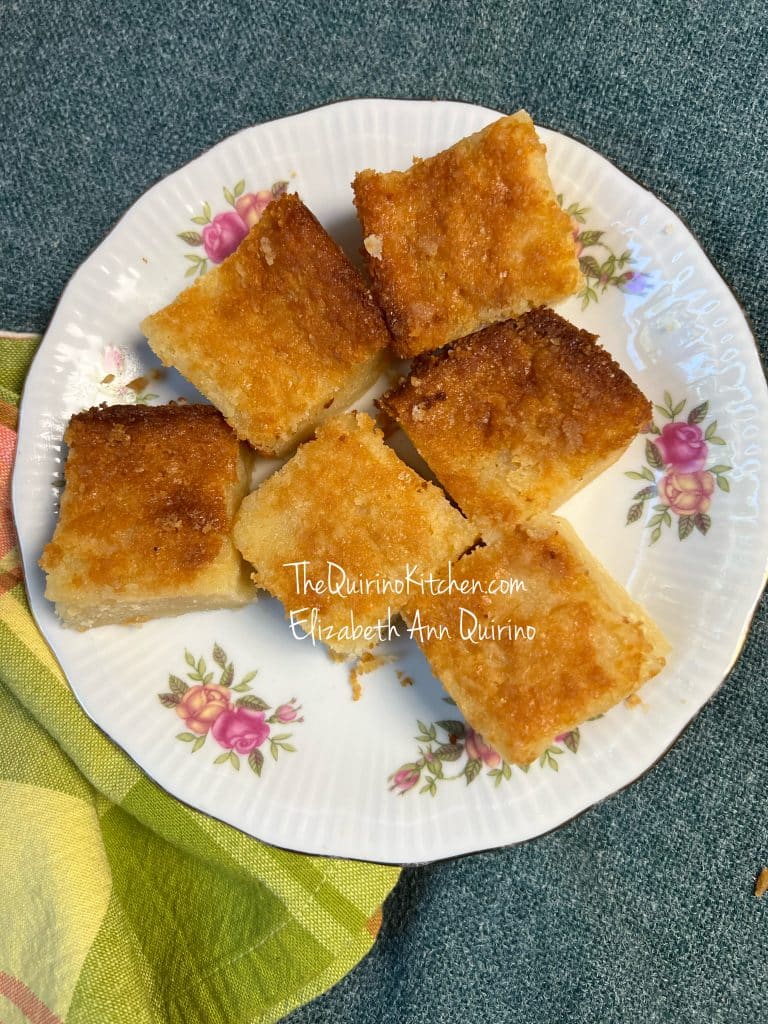
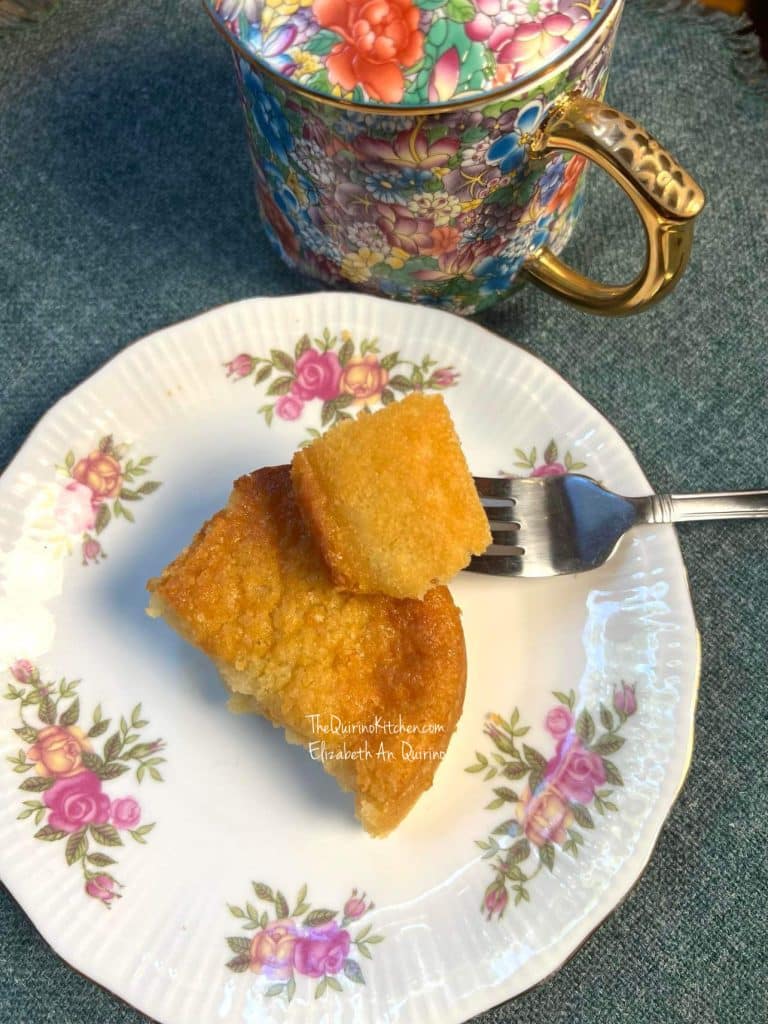
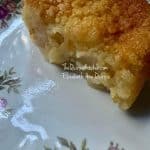
I waited for the Mochi Cake to cool down for at least one hour, before slicing it into small squares. The coconut-butter aroma floated around the air. Each slice was fluffy as I slid my fork under the thick, dense golden yellow cake. The cake’s chewy texture reminded me of our Filipino cassava cake. The dreamy flavorful piece was mildly sweet. The outer layer was crisp, but sliding the fork further, one enjoys the soft, moist and tender inside layer.
This is the perfect cake to bake and bring to potlucks, family gatherings or simply to enjoy for an after-dinner dessert or snack for anytime.

Butter Mochi Cake
Equipment
- Electric mixer – stand mixer or hand held
- Mixing bowls
- Baking pan – metal or glass – 9 x 13 inches
Ingredients
- 1/2 cup unsalted butter or 1 stick; plus around 2 tablespoons more to grease the pan
- 1 pound mochiko (glutinous rice flour/ sweet rice flour), like the Koda brand, 1 box
- 1 ½ teaspoon baking powder
- ½ teaspoon kosher salt
- 4 whole large eggs
- 2 cups granulated sugar
- 1 can (13.5 ounces) coconut milk
- 1 can (12 ounces) evaporated milk
- 2 teaspoons pure vanilla extract
Instructions
- Place rack in the middle of the oven.Preheat the oven at 375 F.Grease the baking pan with additional 2 tablespoons of softened butter, at the bottom and sides.
- Melt the 1/2 cup (1 stick) butter either in the microwave for 1 minute on high; or in a small stockpot on the stovetop on medium-high for around 3 minutes.Set the melted butter aside. Keep the butter wrapper to grease the baking pan some more.
To Mix the Batter
- In a large mixing bowl combine the dry ingredients: the whole box of Mochiko rice flour, baking powder and salt. Using a whisk, stir and mix the ingredients making sure the baking powder and salt are distributed evenly. Set this bowl aside.
- In the bowl for the electric mixer, add the 4 eggs and sugar. Stir the batter first at low speed, then gradually moving up the speed to a medium till the mixture becomes creamy, smooth and glossy, about 3 to 4 minutes.
- Pour the coconut milk to the batter and continue mixing to combine the ingredients.
- Add the evaporated milk to the batter. Continue mixing at a medium-high speed to incorporate ingredients.Pour the vanilla extract and mix to combine.
- Add the dry ingredients all at once into the bowl together with the liquids. Mix ingredients well on medium-high speed, till batter is smooth and there are no lumps, about 3 to 4 minutes.Tip: Remember to stop the mixer every so often, and using a spatula scrape the sides and bottom so that the flour mixes well.
To Bake:
- Pour the batter into the pre-greased baking pan. Tap the pan on the counter around 2 or 3 times, to bring any air bubbles to the surface.
- Bake at 375 F for 45 minutes.Use a cake tester and pierce the middle top part to check if done. If the tester comes out clean, cake is done.
- Let the cake cool on the counter for around 1 hour, till manageable enough to hold the pan. You can place the pan on a wire rack to cool.When cool, slice in individual serving pieces, around 2-inch sized squares. Serve warm, or at room temperature.
To store:
- Store Butter Mochi Cake slices in a covered container in the refrigerator for up to 4 to 5 days.You can also freeze this cake in an air-tight, freezer-friendly container and it is good for up to 1 month. When ready to serve, thaw and reheat in the microwave for a few seconds.
Cook's comments:
- What is Mochiko: Namiko Chen of Just One Cookbook defined mochiko as a fine white gluten-free flour made of glutinous/sweet rice. Often used as an ingredient in Japanese traditional sweets. Also used in Korean desserts, and Filipino bibingka-style cakes.Optional topping: Namiko suggested an optional topping of a few tablespoons of unsweetened coconut flakes, sprinkled on top of the baking pan, just before baking.
Nutrition
Copyright Notice: Hello, Friends! Please DO NOT LIFT OR PLAGIARIZE The Quirino Kitchen recipes on this blog, my original recipes, stories, photos or videos. All the images and content on this blog are COPYRIGHT PROTECTED and owned by my media company Besa-Quirino LLC by Elizabeth Ann Quirino. This means BY LAW you are NOT allowed to copy, scrape, lift, frame, plagiarize or use my photos, essays, stories and recipe content on your websites, books, films, television shows, videos, without my permission. If you wish to republish this recipe or content on media outlets mentioned above, please ASK MY PERMISSION, or re-write it in your own words and link back to my blog TheQuirinoKitchen.com to give proper attribution. It is the legal thing to do. Thank you. Email me at [email protected]